How to insert tree video with alpha channel included on a layer of your composition
Had you ever felt powerless trying to incorporate tree video in motion to your scene?
We know perfectly this feeling. It’s very frustrating.
In this post, I show another path to follow and get professional results with our trees.
Not always is necessary spend hours setting the scene and buy big render farm to get a top result.
You’ll get pro appearance from scratch to the final result in MINUTES !!
INTRODUCTION
The addition of trees to video and architectural visualization productions is not new.
This addition to both still as moving scenes is not complicated, as you will see in this easy tutorial. The most complicated issue is obtaining these kinds of files. There are two ways: filming them by ourselves or getting them from the Internet.
I encourage you to try. Just go out with your camera. Find the right shooting spot. Be patient and film a few hours. Do the sequence’s post-production deleting defects and, eventually, prepare the final sequence in HD.
You will soon find it’s quite technically difficult and requires time to get the quality and characteristics desired to use the final files in production.
I encourage you to choose the second option: acquire our trees.
This tutorial will teach you how to do the post-production process with our videos.
I will show you how to perform the post-production, the versatility of these files in order to convert still images into moving sequences and how they contribute to enhance your video works.
We’ll focus on the details that will make our post-production both credible and professional.
FIRST STEP: PREPARING THE IMAGES
Although it can be applied to moving images, the concepts are the same. The only variation is the time line evolution of the masks.
We prepare the scene using Photoshop. We select the alpha channel where our tree video will move initially. It will be necessary to shrink the selection borders by one or two pixels in order to make it work properly.
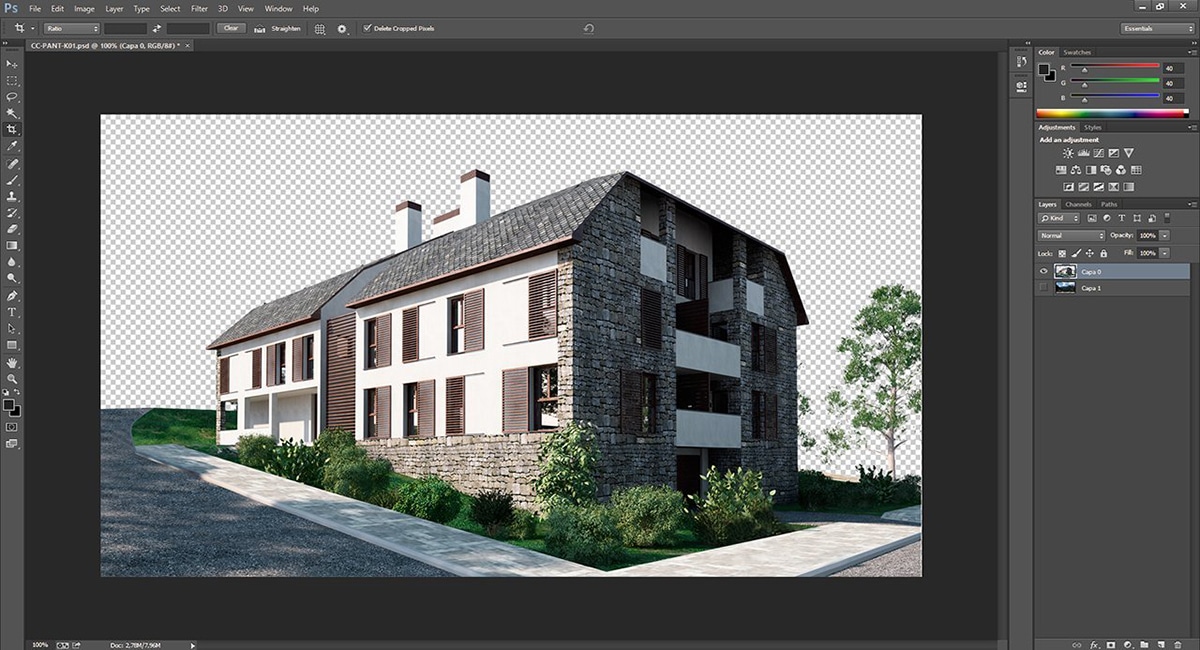
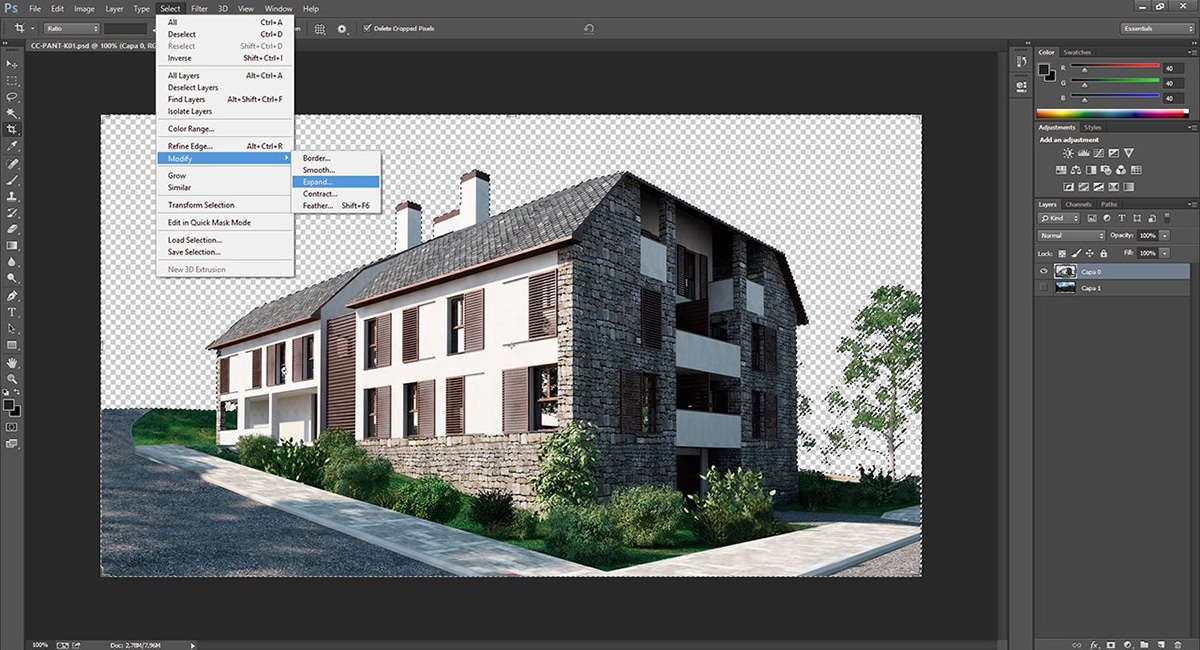
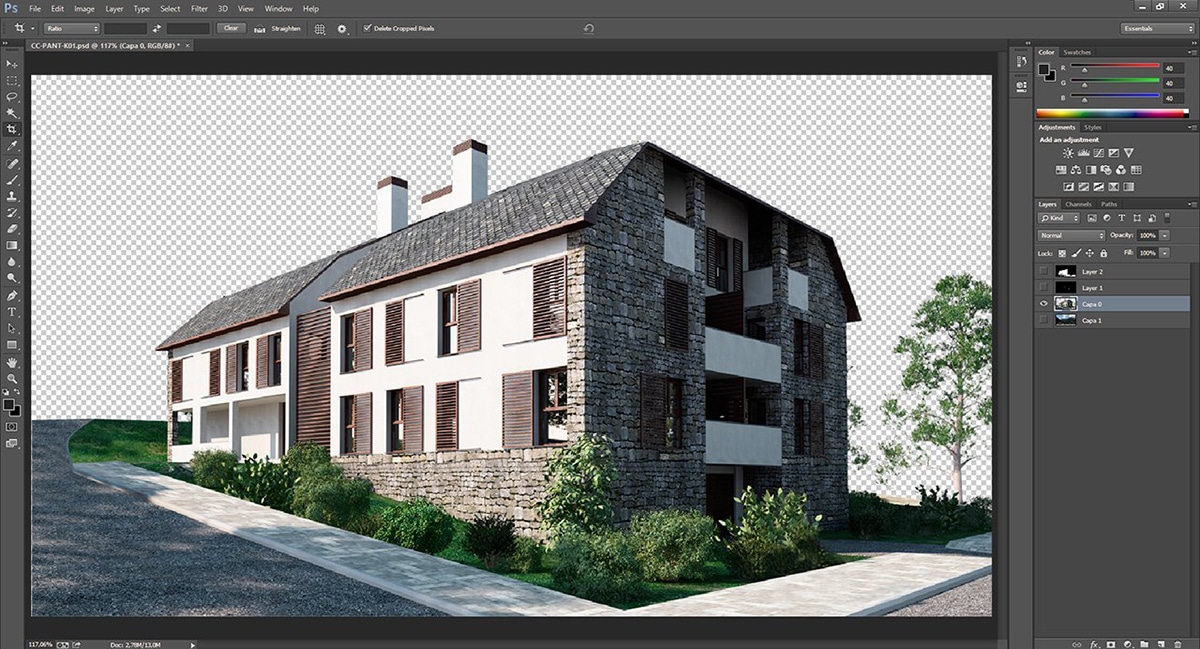
We must understand that adding moving tree video to a scene brings consequences. We can’t just add the trees and forget about the rest. What do I mean by this?
If a sky is cloudy -like the one used in this example- and the scene shows a sunny day, the clouds will have a shadow on the ground. There should be a consistency between the clouds and what they cause, between their movement and the shadows they cause.
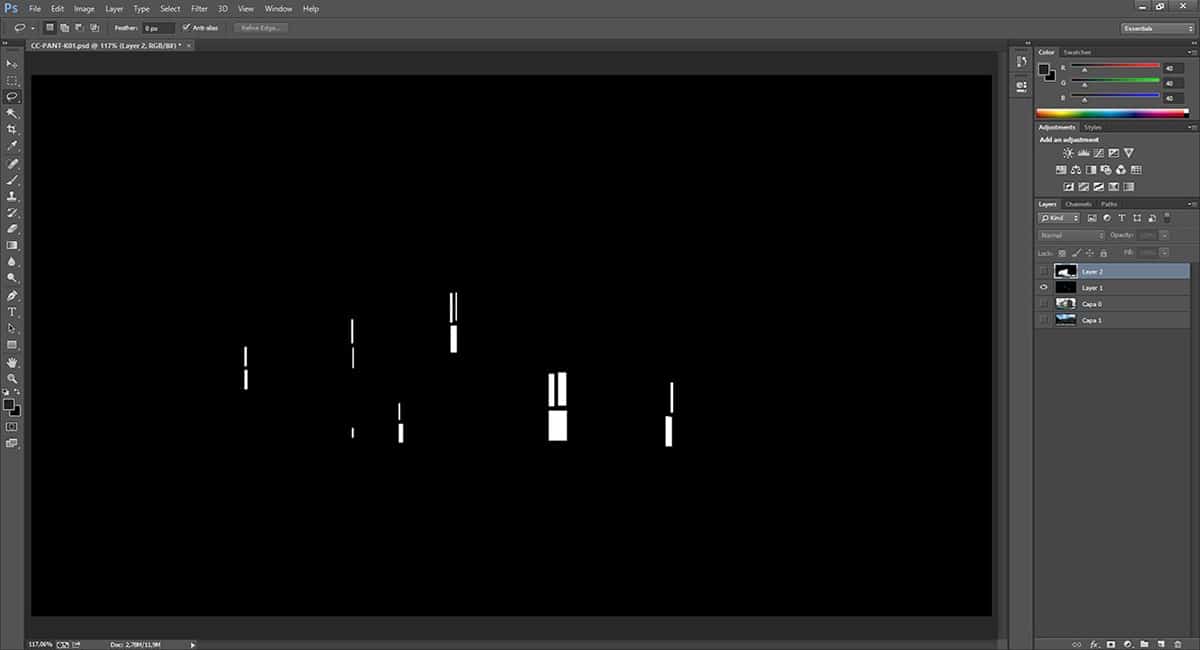
We generate a new alpha for each scene that interacts with the trees. Afterwards we select the areas where the shadows of the tree video will apply: ground, buildings, … differentiating all the different panes.
If our scene includes glass, it will reflect the movement of the trees. We select upfront the glass that are reflecting.
Please bear in mind that the shadowed areas are not affected, so there’s no need to choose them.
Each alpha has to be saved as a white and black file in a folder we previously prepared.
SECOND STEP: AFTER EFFECTS, OUR COOKING KITCHEN
Once we have prepared all our Photoshop files, we have to combine them properly in After Effects.Let’s import the files we saved:
The render The trees The alpha channels
Drag the render or the trees to our composition. When arranging the layers, we’ll obviously set the render in front and the trees behind. These ones will be trimmed when applying the matching alpha channel.
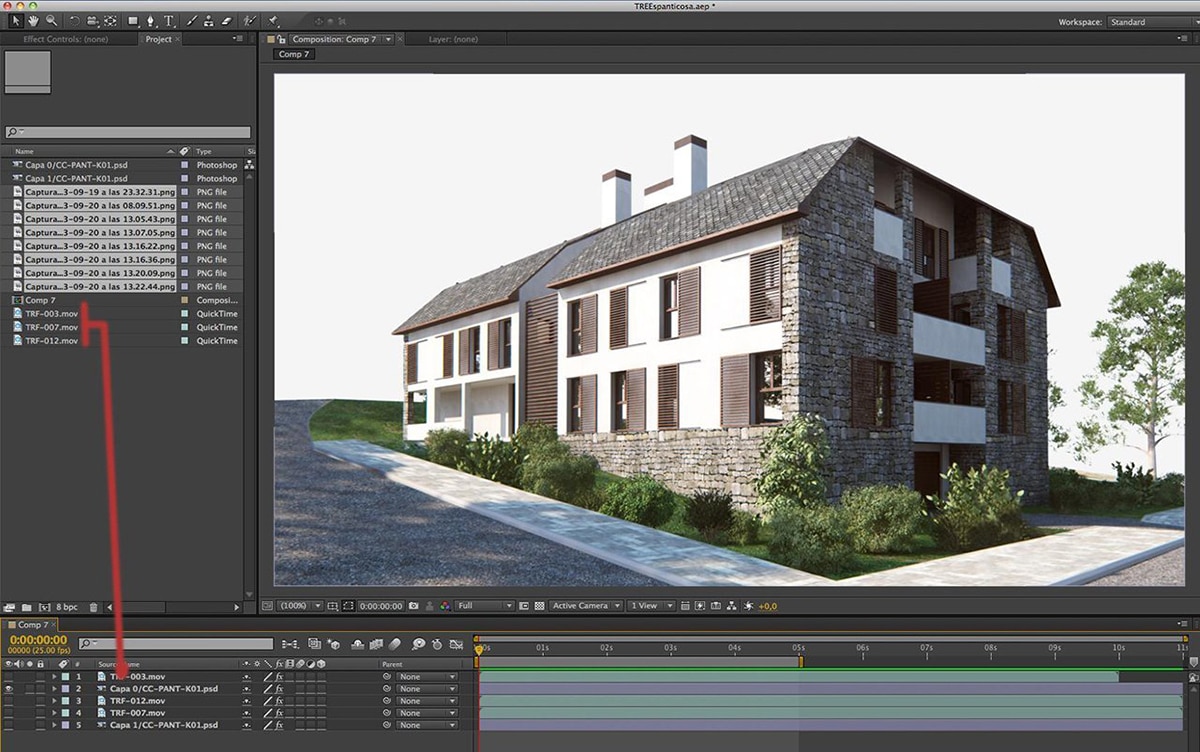
First we have to determine the direction of the light. Both layers, render and trees, have to be consistent. Normally, the render gives us a hint. We can know the approximate position of the sun by looking at the shadows. Once this position is settled, we can probe the proper tree video orientation. Trial and error is the best system in this situation. There are only two possibilities: option A or B as a result of the horizontal flip of the sequence. Only experience will help deciding which fits better.
Next step is retouching the parameters of the trees: brightness-contrast, saturation, … until it fits our scene.
THIRD STEP: APPLYING MASKS IN AFTER EFFECTS TO THE TREE VIDEO
We have to activate the MODES column in the LAYERS panel.This way, we define each layer’s alpha (previously saved file in black and white).We drag the desired mask to our composition and duplicate the trees. We apply matte luma mode. This way, the tree layer will have the layer above as alpha. Try it, it’s easier doing it than explaining it ?
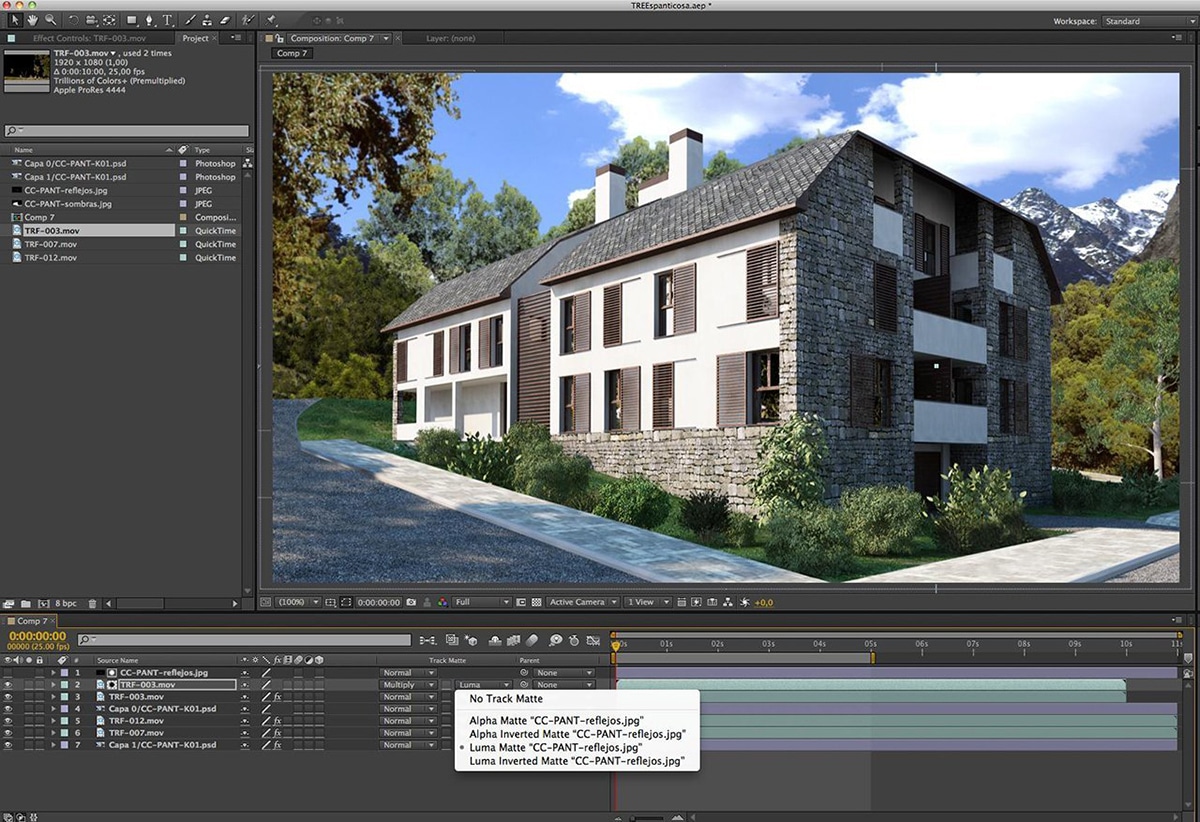
REFLECTIONS OF THE TREE VIDEO
We’ll generate the tree’s reflections on windows and reflecting materials. We should not forget about horizontally flipping the trees in the reflections. If a tree fades to the right, the reflection will do it to the left.
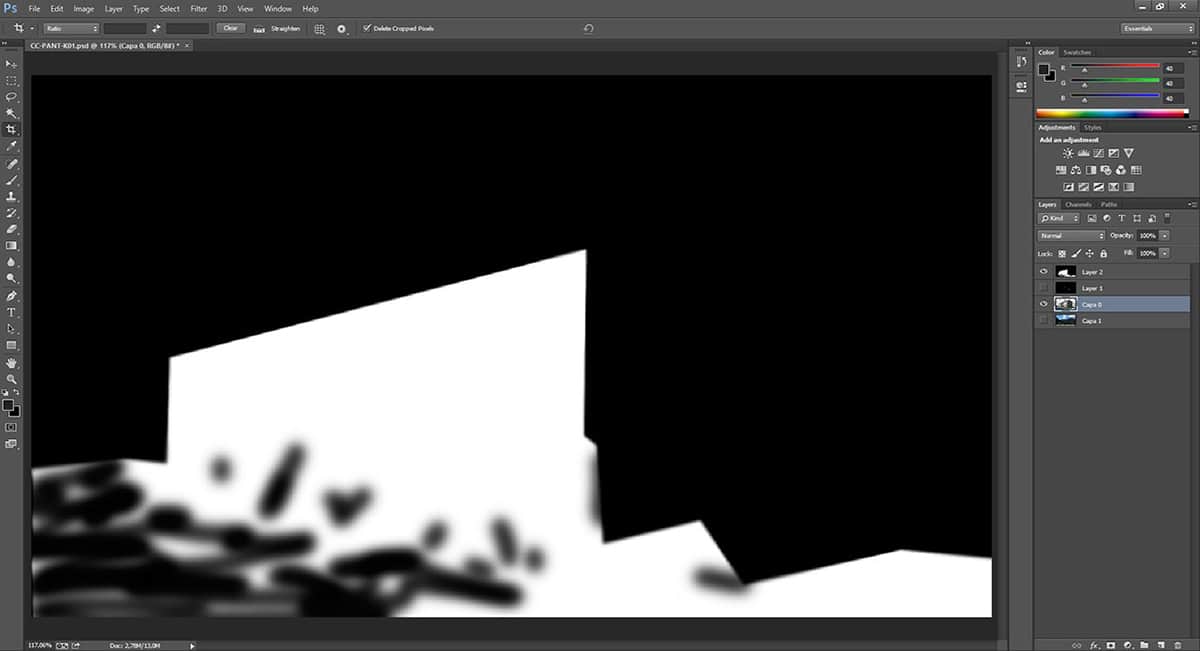
If the mask is not too complex, we can also generate it manually on After Effects.
SHADOWS OF THE TREE VIDEO
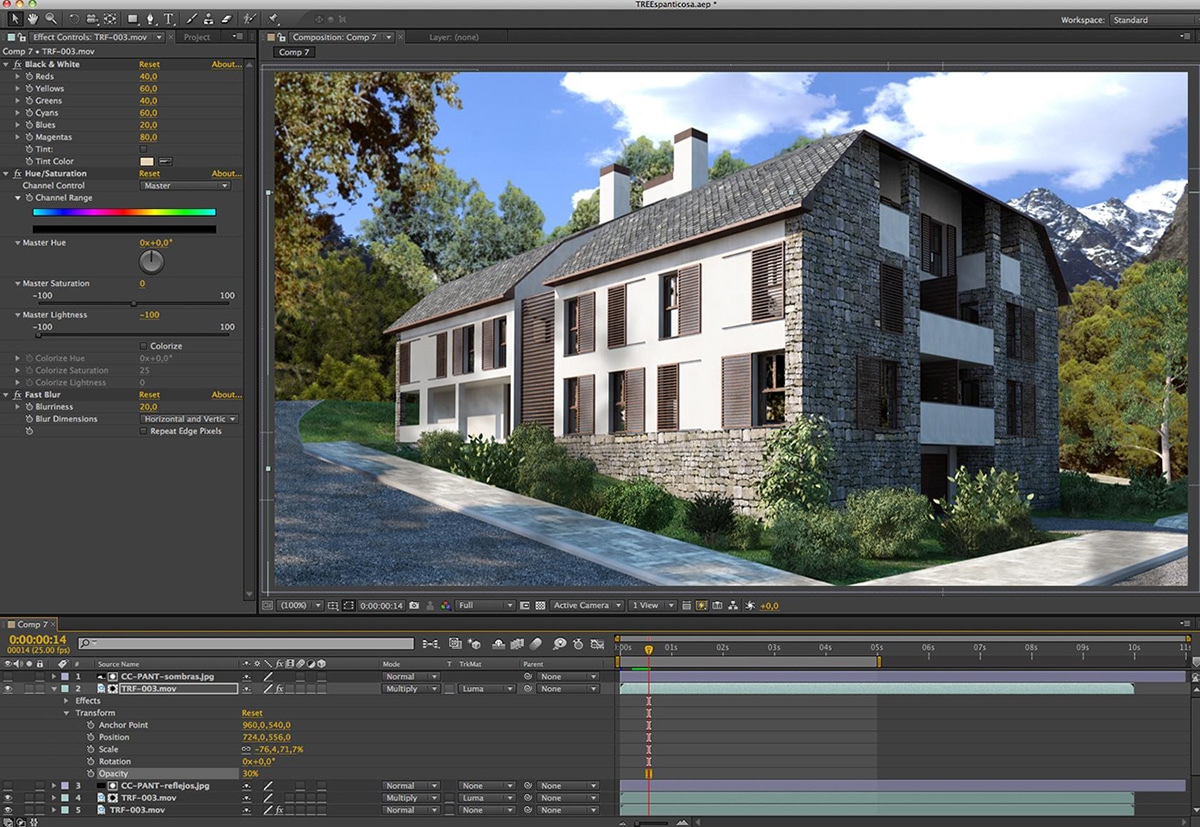
In order to generate the shadows, we’ll duplicate the tree layer, desaturate, blur, invert the color and play with the color values in tone/saturation until we find the desired effect.

We leave the fusion style as multiply.

If the mask is not too complex, we can also generate it manually on After Effects.
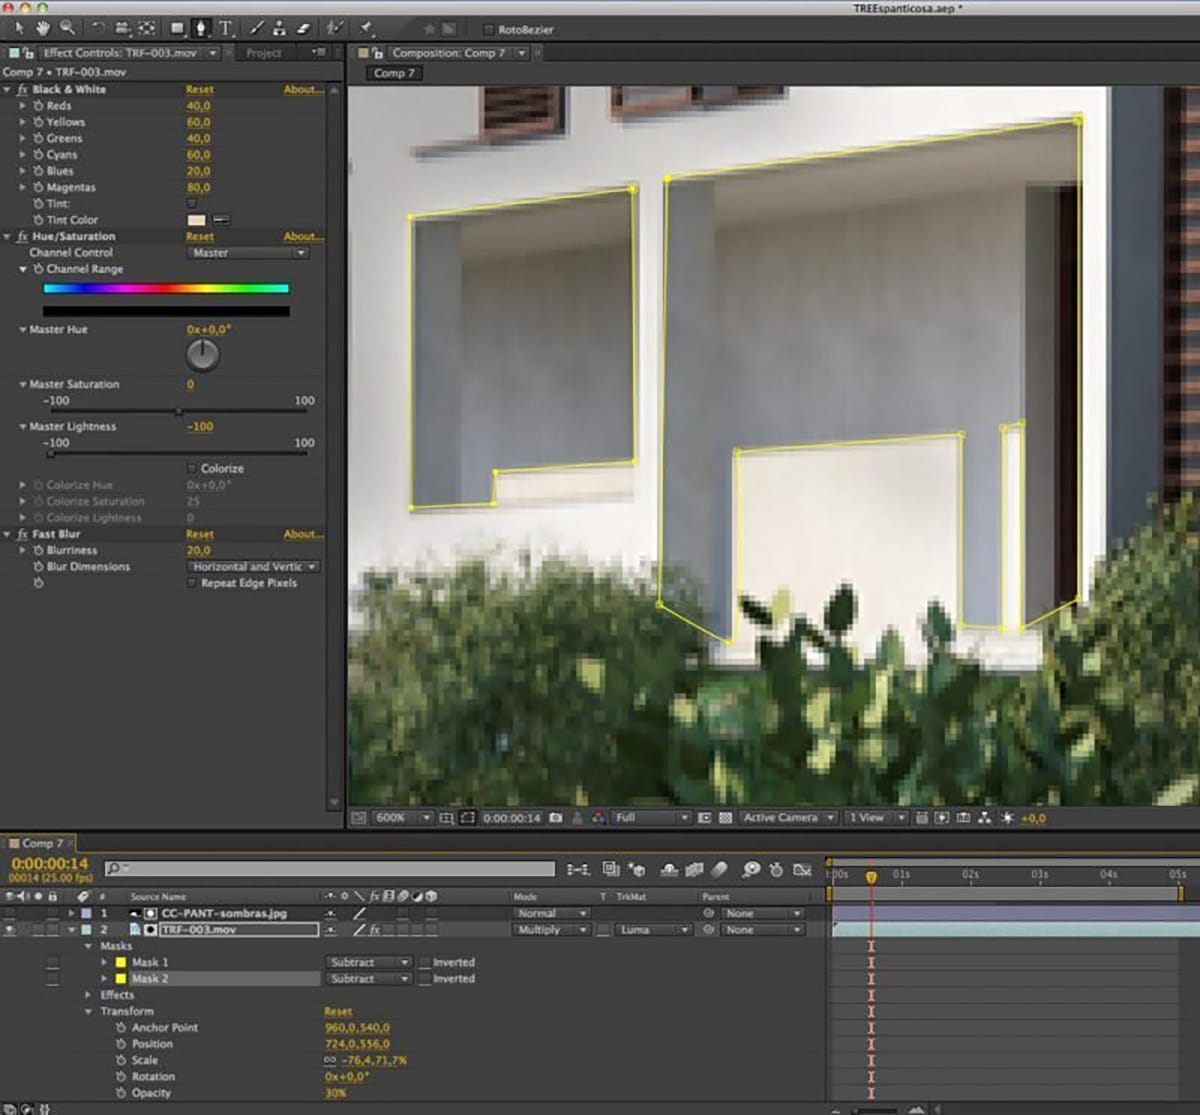
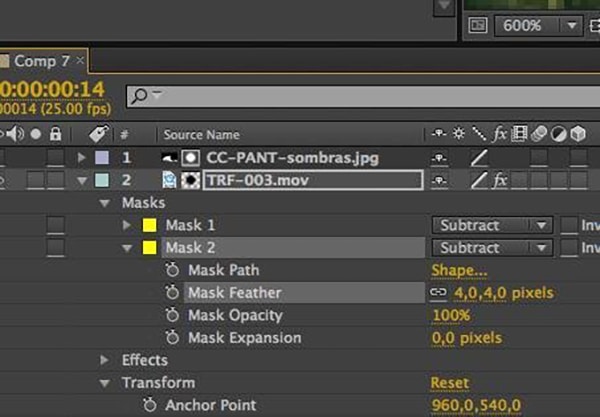
We use the mask’s parameters like contract or expand in order to hide the cut.
FINAL TOUCHUPS
We can touch up the trees by modifying the values of brightness-contrast, saturation until they match our scene.
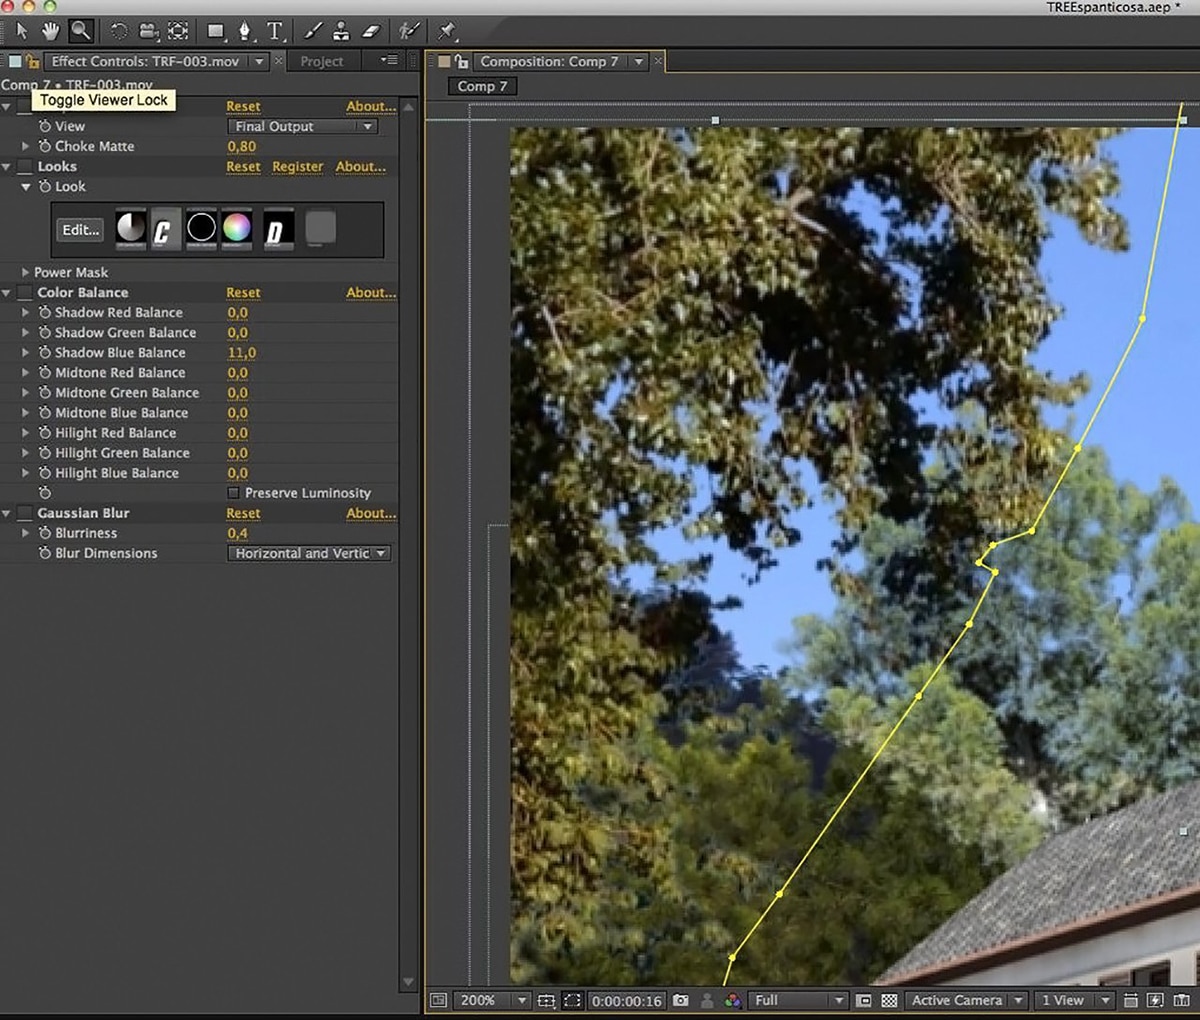
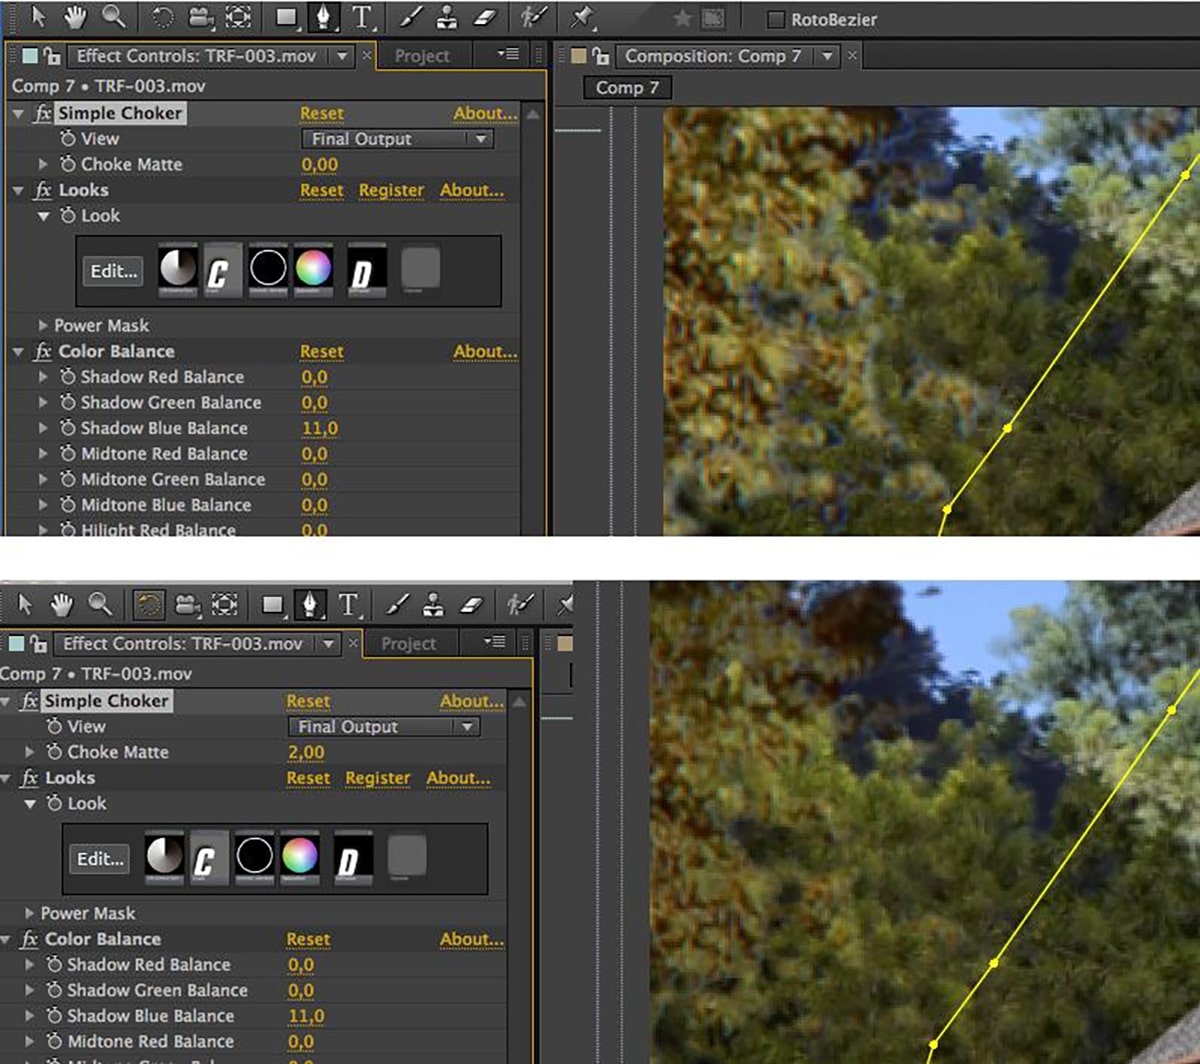
Tree video can stand in front, in the back, interacting with the scene (between two buildings), …We’ll have to create a mask for the objects standing in front, trees behind and rest to background.Possible halos at the trees’ edges can be removed by choosing an effect: SIMPLE RETRACTOR, with a higher or lower value depending on the halo. This should be enough to integrate the tree in a realistic way.
I hope this guide helps you to start up.It’s a starting point. Your will to improve on the final result will widen the limits of a perfect integration. Each case is different and needs hours of trial and error to get good results.
If you enjoyed this post and you want to receive the next in your email, sign up here and I will send it to you.

Leave A Comment